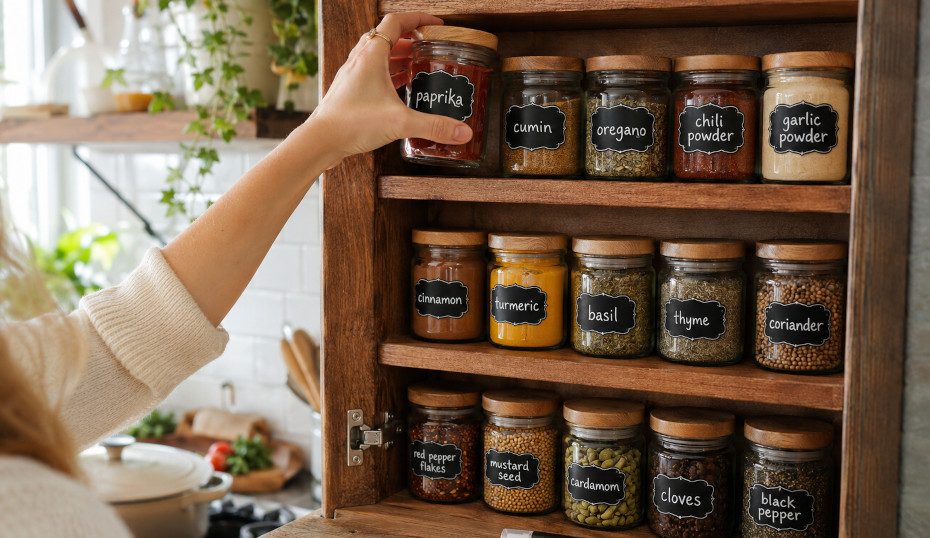
I used to waste way too much time digging through my spice cabinet while cooking dinner. Smoked paprika and cayenne looked almost identical in matching jars, and I once added cinnamon instead of cumin to a pot of chili because I grabbed the wrong container in a hurry.
That frustration finally pushed me to make my own DIY chalkboard spice jar labels.
What started as a quick weekend project ended up changing the way my kitchen felt every day. The cabinet looked cleaner, cooking became easier, and I no longer had to open three jars before finding the right spice.
The best part is how flexible the labels are. Whenever I refill a jar or swap spices around, I can wipe the surface clean and relabel it in minutes instead of peeling off old stickers or printing new labels.
If you want an inexpensive kitchen project that’s both practical and visually satisfying, this is one of the easiest upgrades you can make.
Key Takeaways
- Chalkboard spice jar labels are reusable and easy to update.
- Chalk markers create cleaner, longer-lasting text than regular chalk.
- Proper prep work helps prevent peeling and uneven paint.
- Matching jars and consistent lettering make spice cabinets look more organized.
- This project works on glass jars, tins, plastic containers, and wooden lids.
- Sealed chalkboard labels hold up better than paper labels in humid kitchens.
What You’ll Need
Before starting, gather your supplies. Most of these are inexpensive and easy to find online or at craft stores.
Materials
- Clean spice jars, reused or new
- Chalkboard paint, either spray or brush-on
- Matte or satin clear-coat sealant
- White chalk markers
- Painter’s tape or label stencils
- Fine-grit sandpaper
- Soft cloth or paper towels
Optional Supplies
- Foam brush for sharper paint edges
- Letter stencils
- Ruler for evenly sized labels
Step-by-Step: How to Make Chalkboard Spice Jar Labels
Step 1: Clean and Dry the Jars Thoroughly
This step matters more than most people realize.
Even a small amount of oil or residue can keep the paint from sticking properly. I learned that the hard way after one of my first labels started peeling near the edges after only a couple of weeks.
Wash the jars with dish soap, rinse thoroughly, and let them dry completely. If you’re reusing old spice containers, remove leftover adhesive using rubbing alcohol or a little cooking oil.
For extra paint adhesion, lightly sand the label area before painting.
Step 2: Tape Off the Label Shape
Use painter’s tape to outline the label area.
I usually place labels toward the lower half of the jar because they stay visible even when jars are stacked close together on a shelf. Rectangles are the easiest shape to work with, but rounded labels look especially nice on small glass spice jars.
If you want a cleaner, more uniform look, measure each label before taping so they line up evenly across the cabinet.
Step 3: Apply the Chalkboard Paint
Apply thin, even coats instead of one heavy layer.
The first time I tried this project, I rushed the paint and ended up with thick edges and visible drips that never fully smoothed out. Since then, I’ve had much better results with multiple light coats, allowing extra drying time in between.
Spray paint usually gives the smoothest finish on curved jars, especially glass ones.
Let each coat dry fully before adding another.
Step 4: Seal the Surface
Once the paint has fully cured, apply a light layer of matte or satin sealant.
I usually wait a full day before sealing because uncured paint can become tacky underneath the clear coat. The sealant helps protect the labels from fingerprints, moisture, and everyday handling.
Avoid glossy finishes because chalk markers tend to slide too easily across slick surfaces.
Step 5: Condition the Chalkboard Surface
Before writing on the labels, lightly rub the side of a chalk stick across the painted area and wipe it clean.
Skipping this step can leave behind faint “ghost” lettering after erasing. I ignored this advice during my first batch of jars, and the original spice names stayed faintly visible for months.
Conditioning the surface only takes a few seconds and makes the labels much easier to refresh later.
Step 6: Write the Spice Names
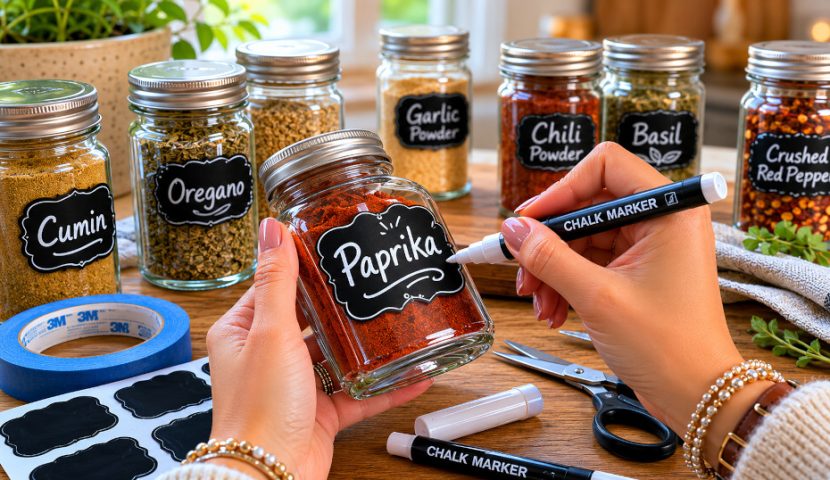
Use chalk markers instead of regular chalk for cleaner lettering.
Regular chalk looked dusty and smudged almost immediately in my kitchen, especially when someone handled the jars with damp hands. Chalk markers made a huge difference. The labels looked sharper, stayed readable longer, and gave the jars a more polished appearance overall.
Let the marker dry fully before stacking or touching the jars.
I also like adding a small purchase date on the back or lower corner of each jar so older spices are easier to rotate out.
Tips for Better-Looking Spice Labels
Keep the Design Consistent
Matching lettering styles instantly makes a spice cabinet feel calmer and less cluttered.
You do not need perfect handwriting. Even simple block letters look great when they stay consistent across every jar.
If handwriting isn’t your thing, letter stencils help a lot.
Use Smaller Lettering
I originally wrote my labels much larger than necessary. Once the jars were lined up together, the oversized text made the cabinet feel crowded.
Smaller lettering usually looks cleaner and is easier to scan quickly while cooking.
Standardize Jar Sizes When Possible
This made a bigger visual difference than I expected.
Once I switched from randomly reused containers to matching jars, the entire shelf looked intentional rather than chaotic. Even inexpensive matching jars can make pantry organization feel noticeably more polished.
Why These Labels Work Well in Humid Kitchens
Paper spice labels rarely hold up well in warm kitchens.
Humidity can cause sticker edges to curl, ink to fade, and adhesive residue to collect dust over time. I noticed this especially during warmer months when condensation occasionally formed near cabinets close to the stove.
Sealed chalkboard labels are much easier to maintain because you can simply wipe and rewrite them whenever needed.
That flexibility makes them practical as well as decorative.
What I Learned After Making Multiple Sets
A few small details made the biggest difference over time:
- Better-quality chalkboard paint lasts longer
- Spray paint works better on curved glass surfaces
- Thin coats prevent peeling
- Chalk markers outperform regular chalk
- Prep work matters more than fancy supplies
One of my favorite parts of this project is that no two sets look exactly the same. Some people prefer minimalist labels, while others add decorative borders, handwritten fonts, or tiny herb illustrations.
The jars become functional kitchen storage, but they also add personality to the space. Even as smart kitchen adoption is accelerating, simple handmade organization projects still offer a level of customization and warmth that many store-bought systems lack.
Frequently Asked Questions
Can I use chalkboard contact paper instead of paint?
Yes. Chalkboard contact paper works well for flat surfaces and is faster to apply. Paint usually adheres better to curved spice jars.
How do I remove chalkboard paint later?
Most painted labels can be removed using acetone or carefully scraping with a razor blade.
Do chalk markers erase easily?
Most water-based chalk markers wipe away with a damp cloth once you’re ready to relabel the jars.
How long do the labels last?
With proper sealing and normal handling, chalkboard labels can last for years.
Can kids help with this project?
Absolutely. Adults should handle the paint and sealant, but kids usually enjoy decorating or writing the spice names afterward.
Why This Small Project Was Worth It
DIY chalkboard spice jar labels ended up being one of those small projects that made everyday cooking noticeably easier.
Instead of digging through mismatched containers while making dinner, I can now spot what I need immediately. The cabinet looks cleaner, the jars are easier to maintain, and updating labels no longer feels like a chore.
The biggest improvements came from simple habits: taking extra time during prep work, applying thin coats of paint, and using chalk markers instead of regular chalk.
Those small choices made the finished labels look far more polished and last much longer.
After finishing my spice jars, I started using the same labeling method on pantry containers, storage bins, and even small herb pots. Projects like how to make your own DIY painted herb garden sign for your kitchen or patio pair especially well with handmade kitchen organization ideas. It’s a simple project, but it adds a surprising amount of order and personality to a kitchen.
About the Author