When my husband and I sold our four-bedroom house in East Cobb and moved into a smaller home, the living room was the first space that made me panic a little. It was nearly half the size of what we were used to, and our old sectional, media console, and desk were not going to fit comfortably.
It was nearly half the size of what we were used to, and our old sectional, media console, and desk were not going to fit comfortably. I realized that instead of finding smaller versions of everything, I needed furniture that could do more than one job.
That led me to several built-in and multipurpose projects that gave us storage, seating, and workspace without taking over the floor.
Key Takeaways
- Built-in furniture can add storage and function without taking up much additional floor space.
- A window seat can provide both seating and hidden storage.
- Floating furniture and wall-mounted desks can keep walkways open.
- Measure your existing furniture, doorways, and walking paths before building.
- Plan around how you actually use the room, not just its dimensions.
- In a smaller home, building storage before moving in the rest of the furniture can make the process easier.
1. Built-In Window Seat With Hidden Storage
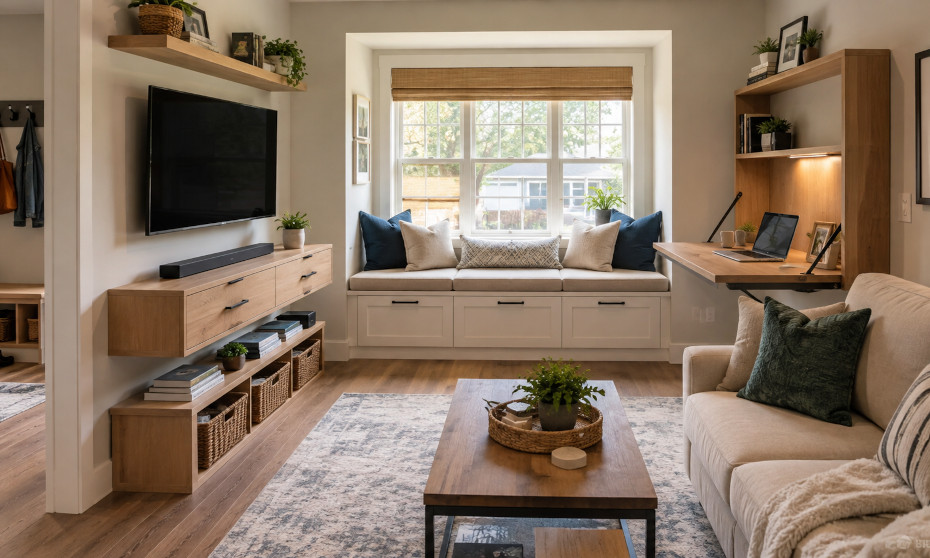
The first project was a shallow alcove beneath our front window. Instead of leaving it unused, I built a bench with three lift-top storage compartments.
I used 3/4-inch plywood for the bench frame and lids, 1×4 poplar for the face framing, piano hinges, and a 2-inch foam cushion. I divided the storage into three sections so I could access one compartment without removing the entire cushion.
The finished bench holds extra bedding, board games, and throw pillows. Since our smaller home doesn’t have a linen closet, that storage has been especially useful.
It also gave us additional seating without adding another freestanding piece of furniture.
2. Floating Media Console With Extra Storage
Our old media console made the new living room feel crowded, so I replaced it with a floating console mounted about 16 inches above the floor.
I used the space underneath for a low bookshelf, which also helps separate the seating area from my small desk nook.
Leaving some floor visible made the room feel more open. One thing I would not overlook with wall-mounted furniture is structural support. The weight of the furniture, television, electronics, and anything stored inside needs to be considered when choosing mounting hardware.
3. Fold-Down Wall Desk
Because the living room doubles as my occasional home office, I needed a workspace that wouldn’t permanently consume floor space.
I built a fold-down desk with a piano hinge, a support arm, and a 24-inch-deep shelf. When folded up, it looks like a shallow display shelf. When I need to work, it provides enough room for my laptop and a lamp.
The support arm is important because the hinge alone isn’t designed to carry the full working load. This has probably made the biggest day-to-day difference because I get a functional workspace without needing a dedicated office.
4. Wall-Mounted Entryway Storage
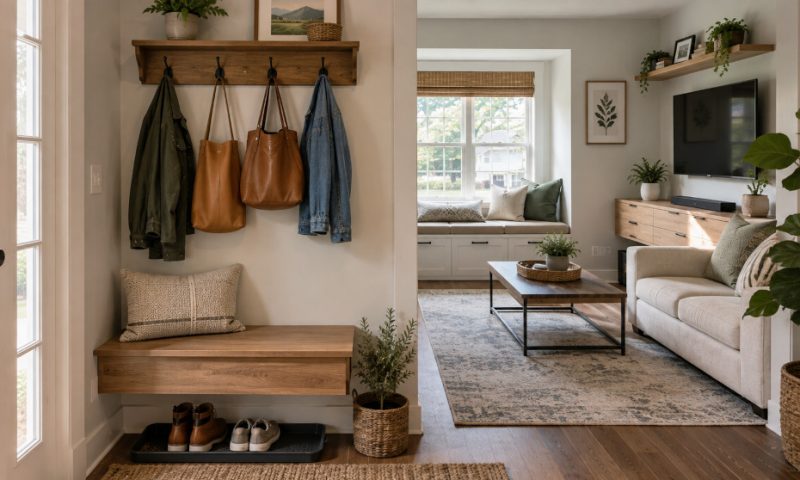
Our entryway opens directly into the living room, so shoes, bags, and jackets could quickly make the space look cluttered.
I built a narrow wall-mounted bench with a boot tray underneath and hooks above it. The setup uses about three feet of wall space.
It isn’t the most noticeable project, but containing the entryway clutter made the entire living room feel more organized.
How I Planned the Space
Before cutting any boards, I taped the planned furniture footprints onto the floor with painter’s tape. I also found that treating each improvement as a manageable weekend project made the downsizing process less overwhelming. Starting with smaller upgrades helped me figure out what the room actually needed before committing to larger built-ins.
That immediately showed me that our old coffee table was six inches too long for the traffic path. I also discovered that the media console I had planned would interfere with the window seat’s storage lids.
I also measured the doorways and hallway turns, especially for pieces that would be difficult to disassemble later.
For a small living room, I would measure:
- Overall room dimensions
- Doorway and hallway widths
- Windows and trim
- Outlets and switches
- Furniture you’re keeping
- Walking paths
- Clearance for doors, drawers, and storage lids
The biggest lesson was that a piece can technically fit and still make the room uncomfortable to use.
A Few Things I Considered in Our Kennesaw Home
Our smaller ranch home has made me pay more attention to clearance and material movement.
Georgia’s humidity can change indoor conditions throughout the year, so I leave a small amount of clearance between built-in panels and adjoining walls rather than forcing everything into a perfectly tight fit.
If you’re in an HOA community around Kennesaw or Acworth, I’d also check the rules before making changes that affect walls or permanent features. For structural, electrical, plumbing, or other permanent alterations, check local requirements before starting.
What I Would Do Differently
If I could redo the move, I would build the storage pieces before bringing in most of the furniture.
I made the mistake of moving everything into the house before starting the window seat, which meant constantly working around a couch.
I also underestimated appliance logistics. Moving into a smaller home can mean dealing with different hookups and clearances. We used Appliance EMT for the washer, dryer, and refrigerator hookups, which meant the appliances were leveled, connected, and tested while I focused on the other renovation projects.
Common Mistakes to Avoid
Don’t buy storage furniture before measuring the actual space. Something that looks small in a showroom can take up much more room once you account for clearance and walking paths.
Don’t overlook structural support for floating shelves, desks, and cabinets. Choose hardware based on the total load rather than the weight of the empty furniture.
I also recommend caulking seams before the final coat of paint and planning the traffic path before fitting furniture around the walls.
Frequently Asked Questions
How much space does a built-in window seat need?
The available depth and clearance around the seat matter more than the overall room size. Measure the seat depth, cushion thickness, storage-lid clearance, and walking path before building.
Do I need a permit for built-in furniture?
It depends on the project and local requirements. Basic interior furniture projects may have fewer permitting concerns, while structural changes, electrical work, plumbing, or other permanent alterations may require additional approvals. Check with the appropriate local building department if you’re unsure.
What’s the best wood for built-ins in a humid climate like Georgia’s?
For larger panels, I prefer cabinet-grade plywood because it tends to be more dimensionally stable than solid wood when humidity changes. Solid poplar or pine can work well for face framing and trim.
Is it worth hiring help when downsizing?
That depends on your experience and the project. I was comfortable handling the basic carpentry myself. For appliance hookups, I preferred professional installation so the equipment could be properly connected, leveled, and tested.
Final Thoughts
Downsizing changed how I think about furniture. In our old house, a piece could serve one purpose. In our smaller Kennesaw home, I want every piece to earn the space it occupies.
The window seat provides seating and storage. The floating console adds storage while keeping more floor visible. The fold-down desk gives me a workspace without permanently taking over the living room.
If you’re working with a small living room, start with the problem you need to solve most. Measure your existing furniture and walking paths, then look for opportunities to make one piece serve two purposes. A smaller room doesn’t necessarily need less function. It needs furniture that makes better use of the space you already have.
About the Author