If you’re a mom like me, you know the struggle of keeping up with your kids’ stuff. Especially something as tiny (and easy to lose) as AirPods. Two out of my three daughters have already lost theirs more than once. Sometimes it’s because they left them out and our lovable but mischievous dog, London, decided they were a snack. Other times, they simply forgot them somewhere. Either way, I thought that if I made them some cute AirPods Case it might help them keep better track of their AirPods.
After seeing a few DIY videos online about making AirPods pouches out of fabric, I figured why not try making one myself? I’ve seen people use everything from leather to old jeans, but I had some leftover Harry Potter fabric lying around (of course I did, I’m a longtime fan!), so I thought I’d turn that into something fun and practical.
Hence, this tutorial on How to Make a Cute Harry Potter AirPods Case out of left over fabric that anyone can do!
What You will Need to Make the Harry Potter AirPods Case
- Harry Potter Fabric (Left over from Joann when they were still in business. Still sad about them closing) for the out layer
- Fabric of your choice for the inner liner
- Fusible Fleece (I use Pellon White Fusible Fleece)
- Snap Fastner Button (if you don’t have a snap fastner button, you can use velcro)
- ½ inch Swivel Snap Hook
- Sewing Machine (For this one, I used my SINGER Heavy Duty 4452 Sewing Machine (yes, overkill))
- Standard Sewing Supplies
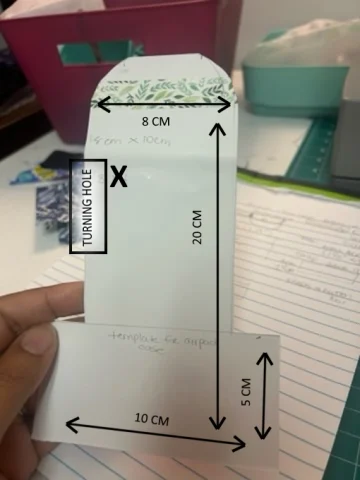
Make the Pattern for the Harry Potter AirPods Case
For the AirPods Case pattern, use a scrap piece of construction paper.
• The Top part is 8 cm wide and 15 cm long
• The Bottom part is 10cm wide and 5 cm long
Easiest way to make it is to cut it is to:
• Cut it down to 10 cm by 20 cm
• Measure 5cm from the bottom, make a line
• Cut off 2 cm off from each side above the 5 cm line and that’s it!
And round off a bit the top part and you are done with it!
And round off a bit the top part and you are done with it!
Steps to Make a Harry Potter AirPods Case
Step 1. Cut Out Your Fabric
Using the pattern, to cut out the inner fabric and the outer Harry Potter fabric.
Cut out a 5 cm by 4 cm for both the outer and inner fabric.

Step 2. Fuse the fabric together with the Fusible Fleece
Make sure that the outer side of the Harry Potter fabric you want to show is not the side you are fusing together.
Following the manufacturer’s instruction, fuse the inner and outer fabric together for the AirPods case pieces and for the tab using a hot iron
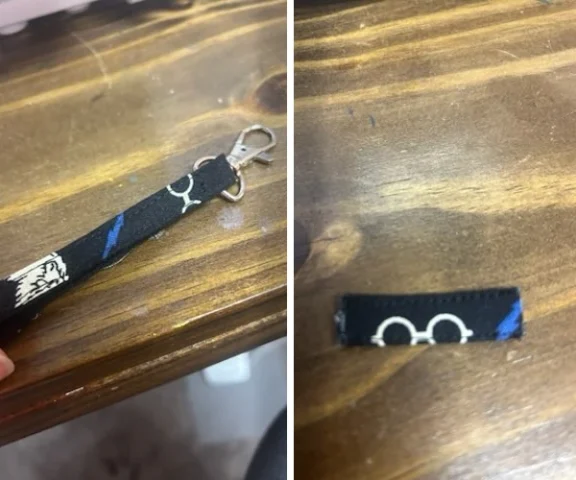
Step 3. Let’s Create the tab
Take the rectangular tab piece and fold the long raw edges inward so they meet in the center. Then fold it in half again to hide all the raw edges inside.
Sew down one long side to secure it. Next, loop the tab around the 1/2″ Swivel Snap Hook and sew it in place.
Step 4. Put the Tab in Place
Place the tab on the right edge of the outer fabric piece, with right sides together (RST) and the raw edges lined up. Make sure the top of the tab lines up with the “X” marking on the pattern piece. Pin or clip it in place to keep it from shifting while you sew.
Step 5. Sew the Pieces Together

Place the outer and lining pieces right sides together (RST). Sew all the way around using a 0.6 cm seam allowance, but leave a gap of about 4 cm open between the notches marked on the pattern as this will be your turning hole and where you sew in the tab.
Trim the seam allowance using scissors or favorite fabric cutter to help prevent fraying, and clip the corners so they’ll turn out neatly. Then carefully snip along any curved edges to help them lay flat and turn it inside out.
Next, give everything a good press with your iron. At the turning hole, fold the seam allowances to the inside so the edge lines up smoothly with the stitching, and press it flat.
Step 6. Sew the Turning Hole Shut
Sew the turning hole closed with a straight stitch close to the edge. Since this part will be hidden inside the pouch, there’s no need to hand-stitch it so machine sewing is perfectly fine.
Next, fold the tab and swivel snap hook over to the inside of the pouch and you should end up with something like in the picture.
Pin or clip it in place to keep it secure while you continue with the next steps.
Step 7. Sew the Bottom and Sides of the AirPods Case
Now it’s time to shape the pouch by sewing the bottom and sides together. You’ll start by folding up the bottom section and attaching it to the middle section.
Begin by folding the bottom left corner up at a 45-degree angle, so that the short bottom edge lines up neatly with the side edge of the middle section. This creates the base of your pouch and starts to form its shape.
Sew along that short edge using a 0.3 cm seam allowance. Start from the folded (angled) edge and stop about 0.3 cm before the end.
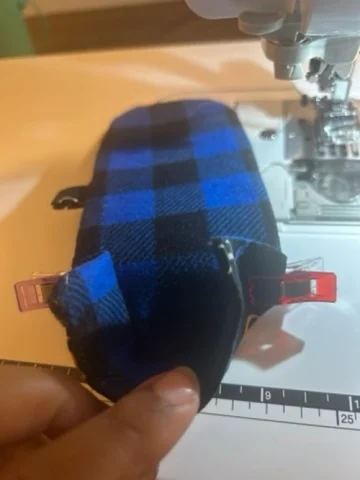
Then, rotate the top layer 90 degrees so the edges line up again. Continue sewing along this new edge all the way to the end, and don’t forget to backstitch to secure the seam.
Do the same for the other side and turn right side out and you are almost done!

Step 8. Install the Snap Fastner Button
Following the manufacturer’s instructions, attach the stud half of the snap to the flap. It should be centered, with the bottom of the snap placed about 0.6 cm up from the bottom edge of the flap.
Next, install the socket half of the snap on the front of the pouch. To find the right spot, fold the flap down and mark where the snap halves meet. On my pouch, the socket snap ended up about 1.3 cm below the pouch opening.
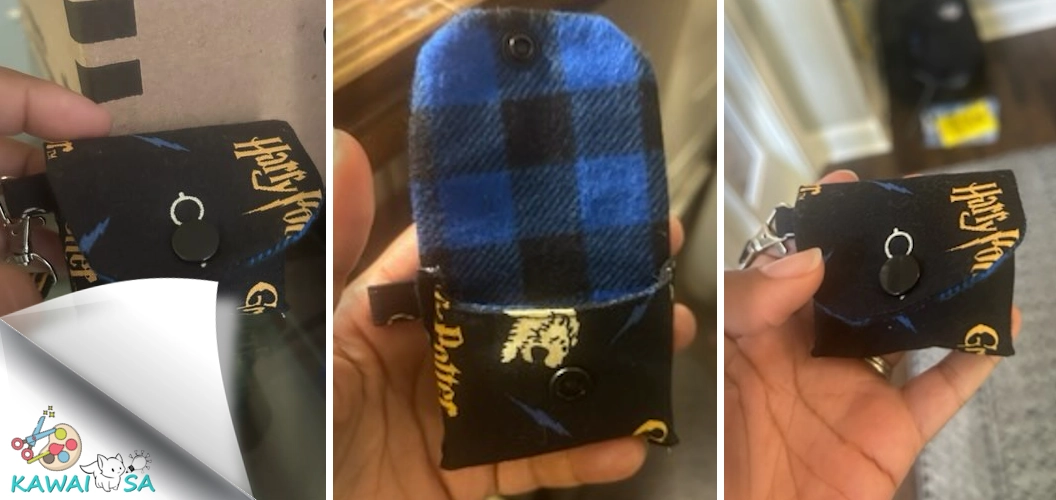
Enjoy Your DIY Harry Potter AirPods Case
Now, you’ve got your one-of-a-kind DIY Harry Potter AirPods case that is both functional, cute, and stylish. My daughters were very pleased with them and now you can do the same!
If you a Harry Potter fan like me, then you should check out these Halloween DIY projects!

By the way, if you click on a link and purchase something, I will get a small commission from it which will be used to support this site.