Standing water at the bottom of a dishwasher usually points to one of three problems: a clogged filter, a blocked drain hose, or a failing drain pump.
The good news is that most drainage issues are surprisingly manageable without professional repair, especially for homeowners already familiar with basic DIY appliance projects. In many cases, it takes less than an hour and requires only basic household tools to fix a dishwasher that doesn’t drain.
I learned that the hard way after opening my dishwasher one evening and finding several inches of dirty water sitting in the bottom of the tub. I assumed the appliance was done for. Instead, the entire problem turned out to be grease and food debris packed into the filter assembly.
Since then, I’ve dealt with several dishwasher drainage issues in both older and newer units, and the pattern is consistent. Start with the simple things first. Most homeowners jump straight to replacing parts when the real problem is often a blockage that has been building for months.
This guide walks through the most common causes of dishwasher drainage problems and the DIY fixes that solve them.
Quick Dishwasher Drainage Checklist
Before taking anything apart, start with these basic checks:
- Clean the dishwasher filter
- Inspect the sump area for debris
- Check the drain hose for kinks or grease buildup
- Verify the garbage disposal connection
- Listen for drain pump activity during the drain cycle
- Inspect the air gap if your sink has one
- Confirm the drain hose has a proper high loop beneath the counter
On many dishwashers, especially Whirlpool, GE, and Frigidaire models, the filter alone is often the issue.
Key Takeaways
- A dishwasher that won’t drain is usually caused by a clog or blockage
- Cleaning the filter fixes many drainage problems
- Drain hoses commonly clog near the garbage disposal connection
- Broken glass and food debris frequently jam drain pump impellers
- Most repairs require only basic tools
- Always disconnect power before working on the appliance
Difficulty and Estimated Repair Time
- Difficulty: Easy to Moderate
- Estimated Time: 30 minutes to 2 hours
- Estimated Cost: $0 to $50 depending on replacement parts
Why Dishwashers Stop Draining
Dishwashers drain through a relatively simple system. Water passes through the filter and sump area, then moves into the drain hose and exits through either the garbage disposal or the sink drain pipe.
If any part of that path becomes blocked, water stays trapped inside the dishwasher.
Common Causes of Dishwasher Drainage Problems
- Clogged dishwasher filter
- Food or debris trapped in the sump
- Kinked or blocked drain hose
- Garbage disposal blockage
- Clogged air gap
- Failed drain pump
Older dishwashers also tend to accumulate grease buildup inside the hose over time, especially in homes that regularly run short or cooler wash cycles.
Tools You May Need
- Phillips screwdriver
- Flathead screwdriver
- Needle-nose pliers
- Wet/dry shop vac
- Old towels
- Shallow pan or baking sheet
- Small brush or toothbrush
- White vinegar
- Replacement drain pump if necessary

Step 1: Disconnect the Power
Always disconnect the power before working on a dishwasher.
Many units plug into an outlet beneath the sink. Others are hardwired and require shutting off the breaker.
This step matters more than people realize. Between the standing water and exposed wiring underneath the unit, dishwashers are not appliances to work on carelessly.
Step 2: Remove the Standing Water
Before troubleshooting, remove as much water as possible from the bottom of the tub.
A wet/dry shop vac makes this much easier, but towels and a cup also work.
Place towels beneath the dishwasher door before removing filters or hoses. Even after draining the tub, leftover water usually spills out somewhere during the repair.
One mistake I made the first time was assuming the dishwasher was completely empty after vacuuming the basin. The moment I loosened the drain hose under the sink, dirty water poured directly into the cabinet.
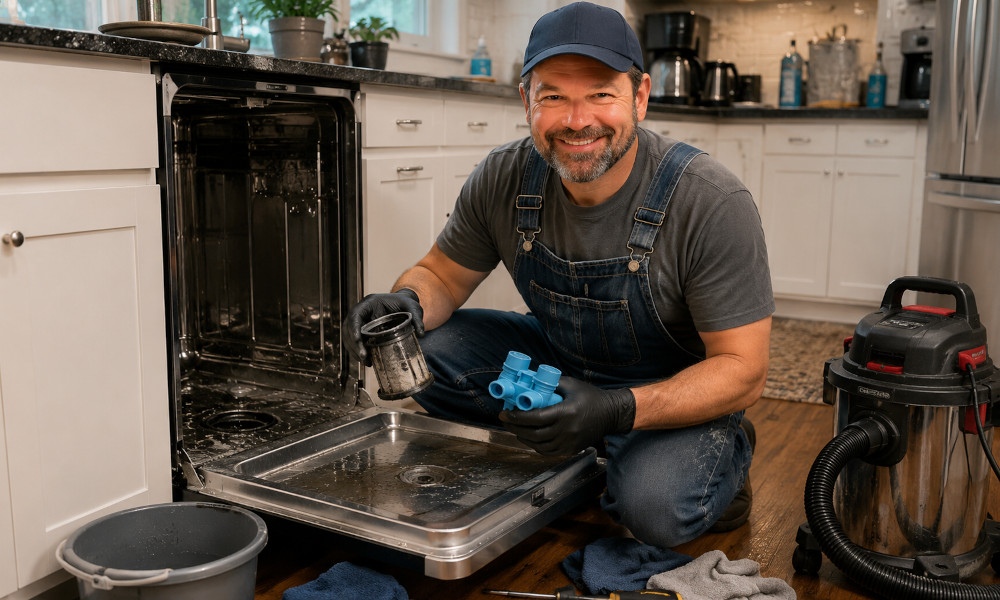
Step 3: Clean the Dishwasher Filter and Sump
This is the first repair step for a reason. Filters collect grease, soap residue, paper labels, food scraps, and small debris over time.
Open the dishwasher and locate the filter assembly at the bottom of the tub. Most modern dishwashers use a cylindrical twist-lock filter along with a flat mesh screen.
How to Clean the Dishwasher Filter
- Twist the cylindrical filter counterclockwise and remove it
- Remove the flat screen beneath it if applicable
- Rinse both parts under hot water
- Scrub away grease and buildup with a soft brush
- Inspect the sump area for debris
- Reinstall the filters securely
The sump area often hides unexpected obstructions. I once found a pistachio shell wedged near the drain opening in an older KitchenAid dishwasher. Another unit had small shards of broken glass jammed around the impeller housing.
Even tiny objects can interfere with drainage.
After cleaning everything, run a short rinse cycle and check whether the dishwasher drains properly.
Step 4: Inspect the Drain Hose
If the dishwasher still will not drain, inspect the hose next.
The drain hose connects the dishwasher to either the garbage disposal or sink drain line. Most clogs form near these connection points.
What to Look For
- Kinks or crushed sections
- Grease buildup
- Food blockages
- Improper hose routing
- Mineral buildup in hard water homes
The hose should loop upward beneath the counter before dropping to the drain connection. This setup, called a high loop, helps prevent dirty sink water from flowing backward into the dishwasher.
Without a proper high loop, the dishwasher may appear to have a drainage issue even when the drain system itself is working correctly.
If the hose seems clogged, disconnect it and flush it thoroughly with water.
Step 5: Check the Garbage Disposal Connection
This problem is surprisingly common after installing a new garbage disposal.
Inside the dishwasher drain inlet on the disposal is a knockout plug that must be removed during installation. If it remains in place, the dishwasher cannot drain at all.
How to Check the Knockout Plug
- Disconnect the dishwasher drain hose
- Shine a flashlight into the disposal inlet
- Look for a plastic barrier blocking the opening
- Remove it carefully with a screwdriver and pliers
- Reconnect the hose securely
A neighbor once replaced their dishwasher before discovering the disposal plug had never been removed. The original dishwasher was working perfectly the entire time.
Step 6: Test the Drain Pump
If the filter and hose are clear, the drain pump becomes the next likely suspect.
The drain pump pushes water through the hose and out of the dishwasher. When the pump fails, you may hear:
- humming
- grinding
- clicking
- or complete silence during the drain cycle
Broken glass is one of the most common causes of pump obstruction.
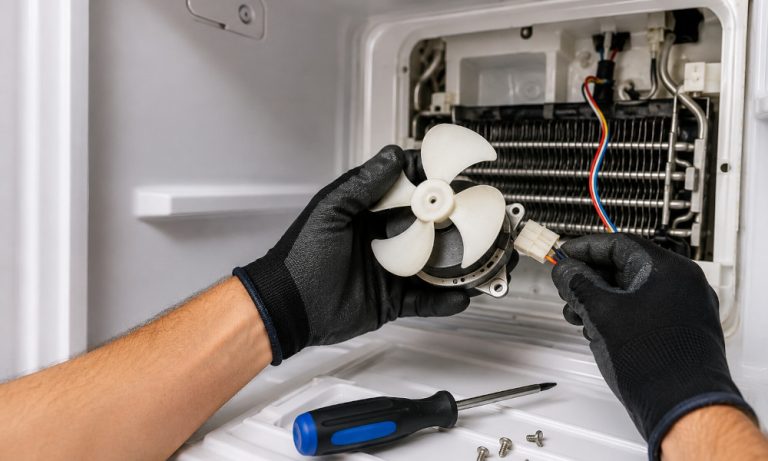
How to Access the Drain Pump
- Pull the dishwasher out carefully
- Lay it on its back with padding underneath
- Locate the drain pump beneath the sump assembly
- Disconnect the wiring harness and hoses
- Inspect the impeller for debris
- Replace the pump if necessary
Drain pumps are model-specific, so verify the exact dishwasher model number before ordering parts.
Most replacement pumps cost between $20 and $50.
Step 7: Inspect the Air Gap
Some kitchens include an air gap mounted beside the faucet. It usually looks like a small chrome cylinder.
The air gap prevents contaminated sink water from flowing back into the dishwasher, but it can clog with grease or food debris over time.
Remove the cap and clean the inside with a small brush or pipe cleaner.
A clogged air gap often causes water to back up onto the sink instead of draining properly.
Maintenance Tips That Prevent Drainage Problems
Most dishwasher drainage issues develop gradually.
Regular maintenance and smart home improvements, including kitchen organization and laundry room upgrades, can make a noticeable difference in how efficiently household appliances operate.
Simple Maintenance Routine
Once a month:
- Clean the filter
- Run a hot cycle with white vinegar
- Follow with a baking soda rinse
- Wipe down the door gasket
- Check for grease buildup near the drain opening
In humid climates like Florida or coastal Georgia, filters and sump areas tend to develop mildew and odor faster because moisture lingers longer inside the appliance.
Leaving the dishwasher door slightly open after cycles helps reduce that buildup.
Homes with hard water may also develop mineral deposits inside hoses and drain components over time.
Common Dishwasher Repair Mistakes
Ignoring the Filter
Many homeowners replace parts before checking the filter and sump area thoroughly.
Always start there first.
Forgetting the High Loop
Improper drain hose routing can mimic a major drainage failure.
Running Repeated Cycles
If the drain pump is jammed with debris, repeatedly running the dishwasher can damage the impeller motor.
Ordering Incorrect Parts
Drain pumps and filters vary significantly by model. Always verify the model number before buying replacement components.
Frequently Asked Questions
How do I know if my dishwasher drain pump is bad?
If the filter and hose are clear but the dishwasher still will not drain, the pump may have failed. Grinding noises, humming, or silence during the drain cycle are common warning signs.
Can I use a plunger on a dishwasher drain?
No. Plungers can damage dishwasher seals and internal components. Manual cleaning is much safer.
Why does my dishwasher smell bad even after cleaning the filter?
Odors often come from grease and residue around the door gasket, spray arms, and sump area. Running a hot vinegar cycle usually helps.
Is a small amount of water normal inside a dishwasher?
Yes. Some dishwashers retain a small amount of clean water near the pump area to protect seals. Dirty standing water is not normal.
How long does a dishwasher drain pump last?
Most drain pumps last between 8 and 12 years, depending on usage and maintenance.
The Bottom Line
A dishwasher that won’t drain looks intimidating at first, but the underlying problem is usually straightforward.
In most cases, the issue comes down to a clogged filter, blocked hose, or obstructed pump. Working through those components methodically can solve the problem without an expensive service call.
The biggest lesson I learned from dealing with dishwasher repairs is that small maintenance habits prevent most major drainage issues from developing in the first place.
Start with the filter before assuming the worst. There’s a good chance the repair is simpler than it looks.